I drink a lot of coffee. I won’t say how much, but trust me, it’s a lot, even for a Seattleite. So coffee bags are a mainstay of my trash.
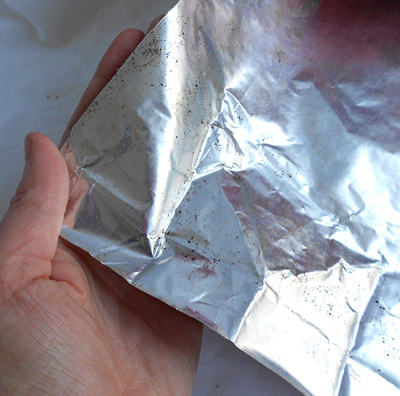
The bags my coffee comes in are made of thick, tough plastic, with a silvery inside and a printed outside. As far as I can tell, they are not recyclable; when even Berkeley-based Peet’s doesn’t have recycling info on their bags that pretty much says it all.
Before using the bags, I cut them open along the seams and washed them thoroughly to remove all the coffee bean oils (glue and paint won’t stick to an oily surface).
Someday I’ll try using the printed side, but it was that silvery inner surface that grabbed my attention. From the very beginning, I had an idea for a small collage that would take advantage of that shimmery, reflective quality. I knew exactly what I wanted to do, and how I was going to do it.
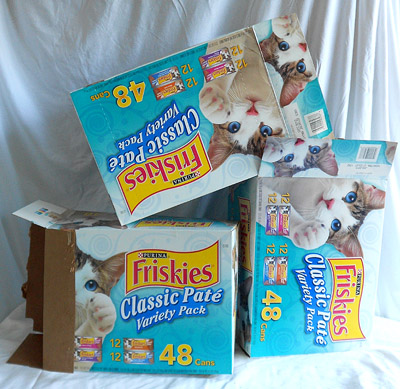
To stabilize the coffee bag plastic I used a paperboard support (which, in a former life, was an interior divider from a case of Fancy Feast cat food), and glued the coffee bag plastic to it with PVA adhesive. After stacking books on top to keep it flat, and leaving it to dry overnight, I went off to bed believing I had this one licked.
Ha!
The next morning, I took my lovely, flat, stabilized piece of coffee bag from beneath the stack of books and set it on my worktable. I went into the kitchen to make coffee, and came back five minutes later to start work–only to find it curled up tight. Worse, when I tried to flatten it the plastic popped right off.
Well, shit.
I’m sure there’s an adhesive out there that will stick to coffee bag plastic, but PVA glue isn’t it. Not being a collage artist, I didn’t have anything else on hand that might have done the job. And one of the not-really-rules-but-still I’ve set for myself on these Trash Day challenges is to use only materials I have on hand. So there was no going out to buy adhesive (assuming I’d even know what to buy).
I made a few attempts at gluing collage elements to the silver side, on the chance that the ink on the printed side was my problem. Much failure (and swearing) ensued. Nothing would stick.
For a moment, I considered scrapping the project altogether. The image of the collage I wanted to make dominated my thinking, and if I couldn’t do it, why bother? And maybe I should just not bother featuring a Trash Day post on my blog, either. Maybe it was a stupid idea. Or maybe I could just put off posting until I had something really impressive to show the world. Sure, I’d scheduled my first Trash Day post for August 1st, but it’s my blog and if I wanted to I could wait–
Precisely the kind of crappy, self-defeating thinking I’ve caved in to far too often, in other words. Fortunately, I can now recognize when I’m in the middle of it and stop myself before I do something stupid (or, more likely, let myself slip into not-doing at all).
My mental image of the collage had to go. I liked the idea, and if it has legs I’ll end up executing it in some other medium at a later date. But remaining fixated on that outcome wasn’t going to help me.
I also had to stop and think–what am I really trying to do with these Trash Day posts? Create finished, portfolio-worthy work that just happens to be made from trash? Or are they about experimenting with unusual materials, figuring out how to make them work, and possibly coming up with something pretty frigging nifty every now and again? This was, I realized, a crucial decision I had to make.
Choose the former? That meant I had to work with an eye toward getting things right. I would have to produce a “successful” piece of work every single week.
Choose the latter? I might not make anything good in a given week. I might make things that were awkward, ugly, or even embarrassing, and if my blog was to have any content at all I would have to post them anyway.
I chose the latter. The truth is, I have no idea how to work with these materials. I don’t yet know their limitations, much less how to work within them. I can’t even make a coffee bag stick to cardboard, for crying out loud; how am I going to consistently come up with finished, “successful” pieces of art every week?
Add to that my ongoing struggle with ruthless perfectionism, which means that no piece of art I make is ever truly successful. Dealing with my nagging inner critic makes art-making a far harder, more emotionally-draining process than it ought to be, which is why I’ve engaged in so much not-making of art over the years. So do I really want to set myself up for failure? Hell, no.
So: Sense of purpose redefined and established, I went back to farting around with coffee bags.
What did stick to them? Artists’ acrylics–applied full-strength, no added water.
Mixing in a bit of Golden’s GAC 200 medium (which is meant to improve adhesion on slick surfaces) helped. So I smeared paint around for a while, trying to figure out how to take best advantage of that silver sheen.
Now I was getting somewhere. But I still had no idea what I was going to do with this stuff once I was done playing with paint.
Another problem still remained: how to adhere the plastic to a support. That its slick surface refuses to accept glue is only part of the trouble; it doesn’t lie completely flat, and some sections are very creased and wrinkled. There may be ways to creatively exploit its flexibility, but I’ll leave that for future experiments–for this project, I wanted to attach it to a relatively flat and stable support.
The answer? Stitch it to the support.
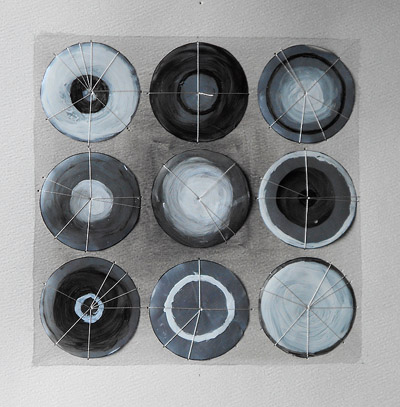
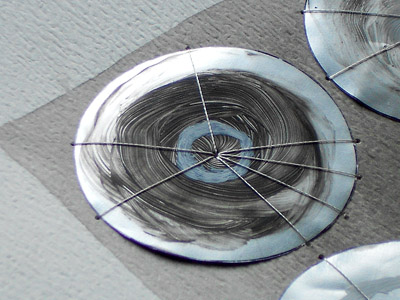
And once I’d decided to use needle and thread, a concept emerged: oversized sequins. So, using a bottle cap, I drew circles on the plastic and started painting them in rough bulls-eyes (a motif I use a lot). Since I’d already spent all goddamned day on this project, and didn’t need to complicate it further, I stuck to black and white and resisted the urge to make it perfect by smearing most of the paint on with my fingers.
For a support, I chose some very old watercolor paper that I’d otherwise never use. I don’t even know if this stuff is acid-free; it must be from the early ’70s, and there’s no archival info on it. Oh, well. It’s good for this. I marked where the centers of each circle should be, painted the background with a gray acrylic wash, and started stitching. By the time the light had failed just enough to make picture-taking a fool’s errand, I had this:
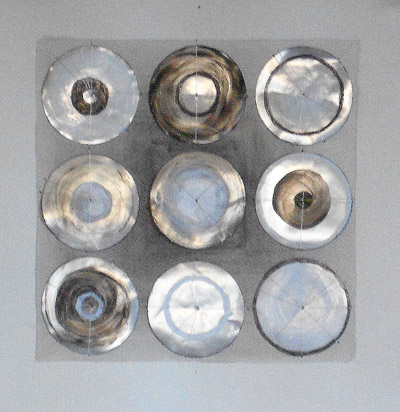
Because of the silver ground on the bullseyes, it looks different as the light and one’s viewing angle change:
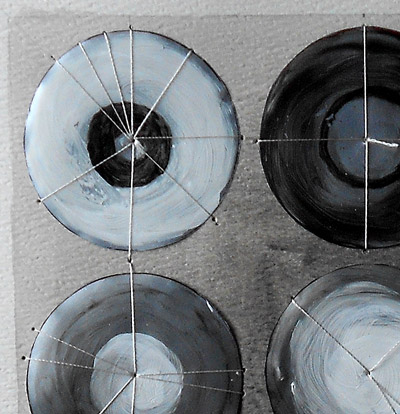
Here’s a couple of closeups of the stitching. I used a silvery-gray rayon machine-embroidery thread (that I bought a long time ago, but don’t remember why):
I’m actually pleased with it, which surprises me. It’s a good start, at any rate, and I’ll probably continue to work on it–add more paint, add more stitching, different threads, maybe layer smaller circles over some of the existing ones. And while I didn’t expect to find inspiration for further work in this project, I’m going to work with this idea some more and see where I can go with it. Thanks to all my smearing paint around I now have a pile of raw materials to work with–and if I run out? I’ll just drink more coffee.
—–
Coming up for next week’s Trash Day:

